Introduction
Welcome to New Player Guide, written by Truth (and sometimes others). The purpose of this guide is to curate all basic knowledge about the games Trimps. The ultimate goal is to be a detailed, all-inclusive, accessible, free, well-indexed, library of all useful resources.
If you have questions about the game Trimps, you should read this page. If you see a Help Vampire[1] asking questions in chat, you should not enable him, but rather lead him to the path of understanding by linking this page to him.
Note: Updated for Trimp Version 4.21.
Work in Progress[citation needed] [2]. This will always be a Work in Progress.
If the format of this guide, or the jokes poking fun at you, annoys you, you should consider reading Xeigho's Guide. There is also the Old New Player Guide, written many months ago. You are also dumb.
If you really need a thorough guide for playing the early part of this game, check out the awesome new Guide From Zone 1.
If none of these help, consider playing with kittens.
Dumb [3] Questions
What is this game?
- This game is Trimps.
How do I Play this Game?
- You play this game by clicking the clickable buttons inside the game[citation needed][4]. You should also check out Guide: From Zone 1.
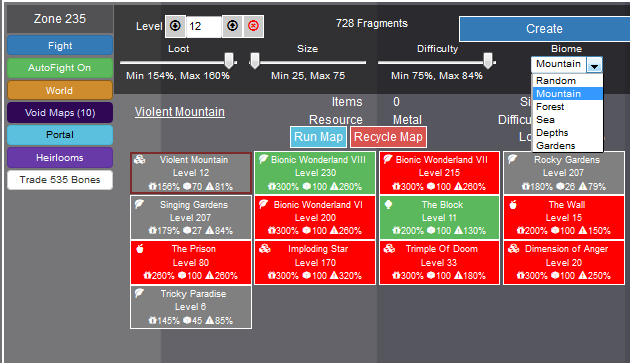
How do I run a map?
- Click the orange map button. If the orange map button turns into a button that says "Abandon soldiers", click on the button again. Click the light blue "Create" button. A new map should have been created. Click on the new map, and click the light blue "Run Map" button.
What are Gems for?
- Gems allow you to prestige equipments (in the upgrade tab), and allow you to buy early-mid game housings. They also have other uses lategame. Please do not ask this question in chat. It has already reached meme status.
What are fragments for?
- Fragments are used to make maps. More are used to make better maps. They are also required for Gateways, a early-mid game housing. Please do not ask this question in chat. Read further to learn more about fragments.
Where is the wiki?
Is this a guide or a FAQ?
What does Pot of Greed do?
- ???
What does AGGRANDIZMENT mean?
Gameplay Basics
For technical issues, see the end of the guide.
Game Progress
Trimps is an incremental game [citation needed][8]. It has no end [citation needed][9][10].The player makes progress by advancing zones in the world. After zone 20, the player can portal. Portalling is the soft-reset mechanics of the game. The player gains helium by advancing beyond zone 20. The player needs to complete "Dimension of Anger" map before they can gain helium. Helium is used for persistent upgrades, which allows the player to delve into deeper zones.
Other persistent progress include Imp-orts, challenges, achievements, and Robotrimps.
What persists through resets?
- Perks and Heliums
- Status of challenges; whether they've been unlocked or completed
- Bones and Imp-orts
- Achievements
- Pet Robotrimp level
- Nullifium
- Heirlooms equipped or carried
- Dark Essence and Masteries
- Total stats
Worker Distribution
Farmer, lumberjacks, and miners are cheap to hire. If a particular resource is needed, it is trivial[citation needed][11] to divert your workers to the corresponding job. Early on, Farmers are the most important, followed by lumberjacks, then miners. As your need for equipments rises, the player can either choose to farm metal on a metal map, or put more workers in miners.
It is also possible to put workers into scientists whenever you need science. However, scientists do not scale as well as the other workers, and it is recommend that you research yourself at later levels.
Trainers and explorers should be hired as food allows. Explorers become near-useless past zone 75 or so, so consider phasing them out.
The Player (ie. What Should "You" Do)?
The player should build and research, depending on what is needed. After mid game, the player excels in these areas, but scales poorly in others. If desired, the player can also trap. If the player receives a turkimp, the player should gather the resource that is currently being gathered by the most number of trimps.
It should be noted that gathering resources with a turkimp active will increase your global looting multiplier by 1.166.
Combat
The mechanics of combat is explained here in details.
Map Unlocks and Equipment Upgrades
After zone 6, players can create maps. All non-unique maps of the same level will have the same unlocks. The player can see how many unlocks a map has under the "item" statistic of the map. Unlocks includes additional housing, certain upgrades, and equipment prestiges.
What are some important levels to run maps at?
- You can check the unlocks page for all the unique unlocks details.
- Some important ones are
| Zone | Unlock | ||
|---|---|---|---|
| 8 | Mansion | ||
| 11 | Shieldblock | ||
| 14 | Hotel | ||
| 15 | Bounty | ||
| 25 | Resort | ||
| 30 | Gateway | ||
| 37 | Wormhole | ||
| 50 | Collector |
- It should be noted that one must run a level 15 map to get the unique map "The Wall", and then run that map to get Bounty. Early on, you might also want to run a level 11 map for Shieldblock. On the first time passing level 33, the player should remember to do Trimple of Doom.
When should I prestige an Equipment?
- Basically as soon as possible. Level one of a prestiged equipment is roughly 9 or 11 times better than the unprestiged equipment. Watch the cost if you have more than 10 levels in that equipment though - if you don't have enough to buy the second level, you may be stuck with a lower stat until you gather the appropriate resources.
Shieldblock vs health shield
- Shieldblock starts off significantly higher than health shields. However, each prestige of shield block only multiplies the stats by about 5.5, while each prestige of health shield multiples stats by about 11. In other words, shield block scales significantly worse than health shields. After about zone 40, shield block quickly becomes useless.
Map Farming
If you need particular resources, you can farm maps for loot. Mountain maps are for metal. Sea maps are for food. Forest maps are for wood. Garden maps are for all three of the previous resources. Depth maps are for gems. The former four maps also give gems, but not as much as depth maps.
How should I control the sliders?
- Difficulty and Loot sliders should be maximized.
- Size slider is complicated. Unless you have sufficient fragments, it should be left alone. A smaller map (slider to the right) will give less loot per enemy on average, but the enemies are also significantly easier. In general, one should get a higher level map rather than a bigger one. The only reason to use a bigger map is if it is impossible to get a higher level map. This should almost never (in the non-mathematical term) occur.
How else can I maximize map loot?
- Get to the highest zone possible. For the same map level, a higher zone level will increase loot. There is an exception once you get chrono and jestimp. Once they become the main source of loot, it is better to be on a zone where you've gotten all the speedbooks from, rather than the next zone where you don't have them.
- If you have turkimp, farm one of the three basic resources. This will give you a 1.166 multiplier to basic loot.
- Population is a direct multiplier to loot, and as such, more population means more loot.
- If you have jestimp or chronoimp, getting the speed/megabooks of the zone will increase loot gained from them.
What level of maps should I Farm?
- Grimy's ZFarm Calculator can tell you what is the optimal map level you should run for loot. I'm not sure if it works for early levels. It also assumes your trimps are fighting 100% of the time. You should read the disclaimer. It is updated for version 4.21. And it should be updated for all future Trimp versions.
- If you are looking for equipment prestiges, you want to farm as high a map as practical. Once you are done farming for prestiges, you may want to farm at a lower level.
- As a general rule, if you seek to maximize map loot, you want to one shot most if not all of your enemies.
How Important is map Loot?
- Farming maps early is questionable. With imp-orts, map farming will give you way more income than your production will. Imp-orts could multiply your map loot by 4-5x.
Void Maps!
- Void Maps do cool things!
Fragments
Fragments used to make maps. Higher level maps, and better maps require more fragments. Fragments are also needed to make gateways, a housing structure.
How do I get fragments?
- You can get fragments from certain loot cells in zones, by employing Explorers, and from maps by purchasing the flutimp imp-ort.
I don't have enough fragments.
- Too bad. Be more frugal with them. Get flutimps.
Bones
How do I get bones?
- They are dropped by skeletimps and mega skeletimps, which are only found in zones. You can also buy them with kreds.
What should I spend bones on?
- You should spend them on Imp-orts and bone portals.
Should I save up 200 bones for the package deal where I get 4 imp-orts and 100 free bones?
- The package deal can only be bought with kreds.
Imp-orts
What order should I get imp-orts?
- Whipimp - Gives both food/wood/metal loot and production to all resources, which is why it takes the #1 spot. It's almost strictly better than Magnimp, but they /do/ stack.
- Venimp/Tauntimp
- Magnimp/Jestimp
- Chronoimp/Titimp/Goblimp
Situational imps:
- Flutimp: Buy if you're having trouble keeping up with fragments in the late game (three digit zones). At that stage of the game, all of your fragments come from loot. A Flutimp kill is roughly the equivalent of one fragment loot cell on the world map. The world map loot in terms of fragments is usually enough for people to afford maps, but if it's not, buy Flutimp.
- Feyimp: This imp does not have a huge impact, and is best if you have the Scientist II challenge completed. This imp is like buying a Scientist challenge reward, as it lets you buy tier 2 equipment before zone 6. Otherwise it doesn't do much.
Can you give some Analysis?
- Whipimp provides is a multiplier to both production and food/wood/metal loot. As production is the most important early on, Whipimp is something to get early. Whipimp is almost strictly better than Magnimp.
- Tauntimp will give roughly 7-12% more population, which can be thought of as 7-12% more damage/hp/block and 7-12% more production/loot.
- Venimp gives breeding speed. 10% more breeding speed is 10% less time it takes to breed to full population. If you do not have full uptime on your trimps fighting, this will increase your dps. It should be noted that 10% more uptime is roughly 10% more dps.
- Jestimp gives map loot. If you do not have Chronoimp or Goblimp, Jestimp will give you roughly 30-40% more basic loot and 80-100% more gem loot at level 0 motivation. At level 20 motivation, you'd get roughly 60-80% more basic loot and 160-200% more gem loot. This is probably better than Magnimp unless you are reaching much higher levels.
- Titimp doubles your damage, which means you can farm roughly 1 level of map higher. That is worth roughly 25% more loot.
- Chronoimp gives 33% less loot than Jestimp. At 20 motivation, you get roughly 40%-55% more basic loot. However, this is additive to Jestimp.
- Flutimp is the only way to get a significant amount of fragments in the late game.
- In a vacuum, Goblimp gives 90% more gem loot from maps. However, this is additive to the additional gem loot given by Jestimp and Chronoimp. Considering that Jestimp might give you 200% and Chronoimp give you 130%, you are simply adding 90% to 430%.
- Feyimp gives you a bit of gems in zones. This will help you get your weapon prestiges without having to go into maps.
Offline Progress
- You will continue to gather Food, Wood, Metal, Science, and Gems offline. The rate of gathering is equal to the rate of gathering online.
- You will not battle offline, nor will you gain loot. As such, you will not progress in the World.
- Since the Helium per hour tab is not actual production, but simply your total helium gained divided by the time, you won't gain Helium offline.
- After the early game, most of your resources come from looting. As such, Offline Progress becomes less and less relevant.
Resets
- You reset by activating the Portal. Activating the Portal will enable you to "cash-in" the Helium you gained and enable you to buy Perks.
When Should I Reset the first couple of times?
- First run: Zone 23. This will give you 55 helium, setting you up for the Underachiever Feat. Run the Discipline challenge.
- Second Run: Zone 30. At this point, you should have picked up the Underachiever Feat. Run the Metal challenge.
- Third Run: Zone 35. Run the Size challenge.
How do I get Helium?
- You get Helium after beating the Dimension of Anger map, which you will get at the end of zone 20. Further helium is earned from killing Blimps and Improbabilites at the end of zones.
- You do not get helium from maps, unless it is a Void Map.
- You get Helium by getting bone portals from bone traders.
- Cumulative helium gain is quadratic - the helium gain from zones 20-40 is about four times that of zones 20-30, and zones 20-50 will give about nine times as much.
- Helium gain from zones 59 is multiplied by 5.
- Completing repeatable challenges can give additional helium boosts.
How do I get Helium Per Hour (Helium/Hr)?
- You don't. There is nothing that passively gives you helium per hour. The Helium per Hour counter simple measures the rate of helium gain for you this run.
When should I use the portal in general situations?
- When your helium per hour decreases.
- If you have pushed to 50, you should complete zone 59. The boss at zone 59 will give a significant amount of helium
- If you are coming very close to zones 25, 30, 35, 37, 40, 45, 50, 75, 100, 125 or 150, it is probably best to push on to reach those zones. All of these zones (with the exception of 37) drop a Gymystic book, which will usually get you at least a couple of zones further. 30 also unlocks Gateway, which gives a huge increase in population. 37 unlocks Wormholes, which will get you to 50 in most circumstances. Similary, if you are one level off the next Gigastation upgrade, it might be better to push on.
Perks
Perks are permanent bonuses purchased with helium. They persists through portals. All perks can be resetted and the helium cost fully refunded once per portal. As such, there is no way to permanently screw yourself over. Congratulations.
This is my first reset; what perks should I get?
- One of Everything. Perk costs increases exponentially. Each level increases cost by 30%. After you get one of everything, loot, damage, health and motivation are good things to go for.
What is the best perk?
- Early on, carpentry. Later on, coordinated. Once you get carpentry, you should put more than half of all your helium into it.
How well do perks scale?
- As cost and enemy strength increases exponentially, additive perks do not scale very well.
- In the late game, the best perks are coordinated, carpentry, resilience, artisantry, and resourcefulness, probably in that order.
- Looting is special, as it is a direct multiplier to helium gained. It could be considered best perk after those ones.
How good is agility?
- Quite good.
- If you have no breeding problems, it doesn't matter that that enemy also attacks faster, since your trimps just replenish when they die.
- Maxing it out is like having a x2.7 speed for combat.
- It makes the game more fun, possibly.
- In maps, it is a direct multiplier to enemies killed, and thus a direct multiplier to loot. Maxing it out is like having x2.7 non-helium loot.
Does Artisantry lower the cost of Equipment Prestiges?
- Yes.
I don't see some perks.
- You need to complete challenges to get them[citation needed][12].
Can you give some Analysis?
- Yes (This is outdated)
- See below for more advanced analysis.
Challenges
How do I unlock challenges?
- You unlock challenges by reaching specific zones, or by completing certain maps.
When should I attempt a challenge?
- You should attempt all challenges ASAP, except for nom/toxicity, unless you want to complete another challenge.
At What Suggested Helium Should I attempt each non-Helium Challenge?
- Read above.
- Below is a table; hopefully someone can fill this in, because I have no idea. If numbers are wrong, find Truth, or post a comment below.
| Challenge | Zone Unlock | Helium | Note |
|---|---|---|---|
| Discipline | 20 | 30 | |
| Metal | 25 | ||
| Size | 35 | ||
| Scientist I | 40 | ||
| Meditate | 45 | ||
| Scientist II | 50 | ||
| Decay | 55 | ||
| Trimp | 60 | ||
| Trapper | 70 | ||
| Scientist III | 90 | ||
| Frugal | 100 | 1M | Really Important to do ASAP. One of the most powerful buffs upon completion. |
| Mapocalypse | 115 | 2M* | *This can be done at around 500K, but you probably won't be using the reward until 1-2M. |
| Coordinate | 120 | 2.5M | |
| Scientist V | 130 | 1M | This should be ran ASAP. One of the most powerful buffs upon completion; even better than frugal (maybe). |
| Slow | 130 | ||
| Mapology | 150 | ||
| Devastation | 170 | 50M |
At What Suggested Helium Should I start using each Helium Challenge?
- In general, you should attempt each Helium Challenge whenever you feel you can reach the required level rather quickly.
- After level 100, daily challenges are usually better than Helium Challenges.
- Below is a table; hopefully someone can fill this in, because I have no idea. If numbers are wrong, find Truth, or post a comment below.
| Challenge | Suggested Helium | Note | |
|---|---|---|---|
| Balance | Idunno | ||
| Decay | 15K | Though this is not a helium challenge, it is often used to speed up the early game. | |
| Electricity | 100 K | Not sure. You might want to keep running decay and skip Electricity all together. However, the Helium bonus will be buffed to 200% in patch 4.3, and might make it more worthwhile. | |
| Crushed | 3M | Pretty much as soon as you are able to run it. Crushed is significantly better than Electricity. Daily is usually better than crushed though. | |
| Nom | One of the few challenges that should not be ran ASAP. | ||
| Toxicity | 25M | One of the few challenges that should not be ran ASAP. | |
| Watch | 80M | You run this if you want an easy run. | |
| Lead | 80M | You run this if you want to be more involved, and get more helium. | |
| Corrupted | Idunno. |
What are the rewards for the challenges?
- Go here. Scroll down. Find the name of the challenge you are looking for. Click on it. On that page, there is an infobox to the right showing the name of the reward.
Is there a Reason to repeat a Certain Challenge?
- If it is not a helium challenge, or decay, there are usually no reasons to repeat a certain challenge.
Should I keep my max health below my block for the Crushed challenge?
- No, unless you are trying to get that achievement.
Wormholes
Should I buy a wormhole?
- Only if you are planning to push to zone 50. Pushing to level 50 will give you certain upgrades which will allow you to push up to zone 60. This will make purchasing wormholes worth it.
How many wormholes should I buy?
- If it is your first few times pushing to 50, 25 wormholes is a good number. Whenever you feel like the boost from wormholes isn't that significant, reducing the number down to 10 is fine.
Why do wormholes cost helium?
- Wormholes were once the most late game housing structure available. Even though that is no longer the case, the cost of wormholes stayed the same.
Voidmaps
When should I do a void map?
- If you are doing a helium challenge, you should do the void map near the end of the helium challenge. Else, you should it near the end of your run. However, void maps become harder the higher zone you are in. You should not do it too late, lest the void map becomes too hard.
Should I do the void map before the end of the challenge to get more helium, or do it after to get a better heirloom?
- Before. Helium is much more significant than the chance for a better heirloom.
Voidmap at zone 59
- While you get 5x the helium for a normal improbability at the end of zone 59, voidmaps done at zone 59 do not get this bonus. The player has to wait until zone 60 to get the 5x helium bonus.
What multipliers affect void map helium gain?
- All multipliers, except the one indicated above.
For challenges that only ends when you do a specific map, like electricity, when is the last zone I can do the void map and still get the challenge helium multiplier?
- The zone before the zone where you can get the map. So for electricity, zone 79 is the last zone.
Heirlooms
What can you do with Heirlooms?
- Many Things
Which Heirloom should I use?
- Use your judgement.
- For staff, Metal is most important, followed by Food, then Wood.
- For Shield, Attack is most important. In terms of damage efficiency, Attack is better than Critical Damage, which is better than Critical Chance. Other important affixes are Void Map Chance and Health.
- With a Magmatic Heirloom, you no longer have to make a choice. The 5 you want are Attack, Health, Crit Chance, Crit Damage, and Void Map Chance.
Production Efficiency or Loot?
- Production efficiency is better late game. For "balance" reasons, the staff multipliers work differently from normal. Production efficiency does not affect normal loot, but it does affect chronoimps and jestimps. On the other hand, loot multiplier only affects normal loot, and does not affect chronoimps and jestimps. Since chronoimps and jestimps tend to make up the bulk of loot endgame, production effiency is better.
When should I add an affix/change and affix?
- Whenever you feel like you'll be using a Heirloom for a few runs, and your Heirloom could stand to have a very good affix added on to it, you should consider adding an affix. Changing one is 3 times more expensive, and is generally not recommended, except for Magmatic (and possibly Ethereal) heirlooms. For Magmatic (and possibly Ethereal) Heirlooms, change affixes if it has 2-4 ones you desire.
When should I upgrade an affix?
Only upgrade Ethereal Heirlooms you plan to keep forever.Since the player now get a full refund on Nullifiums spent on upgrading heirlooms when you recycle a heirloom, you can upgrade an affix whenever you feel like it.
Challenge²
- Challenge²s give a permanent bonus to stats and helium gain. They were named thus to make it hard to edit the wiki. I'm not actually sure how to make the ²; I just copied it from another page. I also assumed that he plural of challenge² is challenge²s.
What is the plural/pronunciation of challenge²?
- An ad hoc committee has discussed this at length. It was split between challenge²s, c²s, and challenges² for the pluralization. For the pronunciation, we couldn't decide between challenges squared, challenge squareds, squared challenges, c-two-(s), challenge cubed, among others. For fairness's sake, I shall be using all of them equally as I write this guide.
When should I do challenge²s?
- About when you do achievements. Challenge²s are arguably about as important, or more important, compared to achievements.
How long should I spend on each challenge²?
- About the same amount of time as on a normal run.
In which order should I do them in?
- It doesn't matter. Probably the one you think will give you the most bonus first.
When should I seek to improve my score/zone/bonus for challenge²?
- Very rarely. Maybe once every hundred runs?
Mastery
Which Mastery should I get?
- If you can't make this decision at this stage of the game, don't get any, for you certainly have not mastered the game.
Golden Upgrades
- For a Helium Run, you generally want golden Helium.
- If the player just got into Magma, and is doing VMs in Magma, the player want the first few level of Golden Upgrades to be Golden Void Maps, assuming the player gets the upgrade fast enough [13].
Spire
- Completing certain rows of the spire grants very powerful (though not necessarily immediately) perks. Each row of the spire is exponentially harder (I believe 5x attack/health) than the last row. It takes about 500M Helium to complete the spire if you try hard. It is much easier to complete it at about 800M.
- Shinis's How to Attempt the Spire is an excellent[citation needed]guide on attempting and completing the spire.
Early Game
This is not an indepth guide to early game, but rather a concise[citation needed]checklist of things to remember. For a step to step guide, consult your brain, or if that is not possible, check out Guide: From Zone 1.
First Run
- Create and run a map at zone 8 to unlock Mansions.
- At zone 11, you will receive "The Block" map. This gives the ShieldBlock and Trapstorm upgrade. (Trapstorm allows you to build traps automatically. You can then use the traps to accelerate breeding speed. )
- Create and run a map at zone 14 to unlock Hotels.
- At zone 15, you will receive "The Wall" map. Run it to get the Bounty upgrade.
- Create and run a map at zone 18 to unlock Uberhuts (Hut upgrade).
- After completing zone 20, you will receive the Dimension of Anger map. Run it to get the Portal.
- Create and run a map at zone 25 for Resorts.
- Activate the Portal at zone 23, or 28+, or when you slow down drastically.
First Portal Activations
Allocate your Perks and activate the Portal. Do a Challenge if you think you can manage it. (Note that you can abandon a challenge any time using the "Abandon Challenge" button in the Perks tab.)
For your first Portal activations, you should do the challenges in the following order:
- "Discipline" challenge to gain the Range perk.
- "Metal" challenge to gain the Artisanistry perk.
- "Size" challenge Carpentry perk
Once the Size challenge is completed, the player should put the majority of their Helium into the Carpentry Perk.
Reaching Zone Level 40
Once you reach zone 40, you should do the Scientist 1 challenge. After this, you will need to decide whether to farm the Balance challenge for Helium, or not. Skip it, if you feel you can reach zone 50 in about 2 days. Else, farm the Balance challenge until you reach zone 50 (~2 days). Note that it is discouraged to get Wormholes while farming the Balance challenge.
Around zone 37, you should start to buy Wormholes and push up to zone 50 (~2 more days). After zone 50, you should run a map to get Collectors.
At zone 50 with Collectors and Gymystic, you should be able to push up to level 60. At level 60, activate the portal again.
Note that, if you have enough helium, you can use the Decay challenge to speed you up to zone 55 quicker than balance. You will not gain the helium boost though - you can choose for speed or for helium.
Late-game
Breaking the planet
Beating level 59 will break the planet. The planet will not remain broken after portaling.
Saving up resources before hand
- As equipment prices drastically lowers after you break the planet, a player might think it is a good idea to stop buying equipments a few levels before breaking the planet. However, it should be noted that resource production increases exponentially as you progress in zones, and as such, saving up too much resources does not have much value.
- One can simply choose not to bother with saving up resources because of the above reason. If one does choose to bother, saving up resources before z58 is not a good idea.
Warpstations and Gigastations
- On your first time breaking the planet, you should get 5+1* (level of gigastation) warpstations before getting a gigastation.
- The numbers should increase over time. It is not unusual for a late-game player to buy 100 warpstations per gigastation.
- Ultimately, you should plan ahead, and spend all your gigastations before you portal.
- 15+3 (Getting 15 before purchasing your first gigastation, then adding 3 more per gigastation. So, 15, 18, 21, etc warpstations before a gigastation.) is a good recommendation for crush.
- 20+3 is a good starting point for nom.
- 40+3 or 20+4 is a good starting point for toxicity. A more recent player suggested 12+4.
- Ultimately, the player should adjust depending on their current situation. If it is too hard to continue adding 3 or 4 each time, perhaps the player should simply maintain the same number of warpstations per gigastation.
- 20+4 is probably good for the level 180 challenges; 20+5 is probably good for corrupted.
- After you reach magma, there is no need to waste too much time with warpstations/gigastations. Just buy nothing for the first 25 or so, and buy max for the last 5-10.
Daily Missions
- Once you've gotten to zone 100, and have done all the one-time challenges, you should do the daily challenges. You can access today's and yesterday's daily challenge in the portal menu. To toggle between today's and yesterday's challenge, click daily in the portal menu, and click the green button. You can end a daily challenge any time by clicking "end daily".
- Daily challenges should not take more than a day. You should almost always do a daily challenge if there is one available.
- Void maps should be done a few levels before the end of daily missions.
Dimensional Generator
The Dimensional Generator (dimsum) is unlocked at the beginning of zone 230. Once you have enough fuel, it will begin to generate max housing every tick. The amount of housing generated is proportional to the square root of your current fuel amount (up to capacity), and does not depend on zone level.
The tick starts at 60 seconds, and will decrease as the player reaches high zones. Each tick will consume a set amount of fuel (a base of 0.5). The dimensional generator will only start a tick after the player has at least this much fuel.
Each zone after 229 will have a set number of Magma cells (16 base). These cells are red on the map. The dimensional generator has two settings, "gain fuel", or "gain Mi". The former will allow the player to gain fuel after defeating a magma cell, and the latter will allow the player to gain 1 Magmite (Mi) instead. Any fuel gained past the dimensional generator's capacity is lost.
Mi can be used to upgrade the dimensional generator. Stored Mi will decay after portalling, and a set percentage (base 30%) will be lost.
Why is it called Dimsum?
- Because the acronym of DG annoyed me.
- Because the dimensional generator generates a large amount of max population; a large number of Dimsum restaurants will also do so [14].
- Because generators [15] and sum are related. If you have a generator for a group, the sum of two elements in the generator will be in the group. Also, you can get any member of that group by repeatedly taking sums and products of members of the generator.
Strategies
Keep your fuel near capacity. The first few ticks of the generator are much more important the the later ticks. In fact, after your population has gotten high enough, the player should switch to Mi farming, as additional population from the dimsum is not as important.
Before the player gets Storage, the player should get to max fuel, then wait in maps for a few ticks, before repeating. After getting Storage, the player should fill up storage, then either turn on the "Hybrid Mode", or wait in a map for the dimsum to generate population.
Taunt-imp Synergy
Once the player's HZE is high enough, the player should fill up storage, then wait in a map until the the fuel past capacity is almost gone, then continue to fill up storage. After repeating this to build up a high base population from the dimsum, the player should turn off getting fuel. As the player continues, the high base population will grow with tauntimps exponentially.
Upgrades
...
Nursery Control Post Magma
After Magma, you lose 20% of your current nurseries each zone. The price of nurseries does not get cheaper. As such, the player should not max out on nurseries. Instead, the player should only get enough nurseries to beat the spire before zone 200. After zone 230, nurseries should be used in the last few levels before portalling.
Advanced
Stat Valuation
Perk Calculators
Perk calculators are usually meant to be used mid-late game. (Like after Zone 60 ish.)
- Grimy's Perk Optimizer is an easy to use perk calculator. Simply export your code, and paste it into the import save part of the calculator. You also need to change the preset appropriately. If you wish, you can tweak the weights you wish to assign to each stat. You can mouse over things (and wait for a bit) to see more info on each button. It is up to date with version 4.21.
- Nsheetz's Perk Calculator uses Google Docs. Hopefully, someone can provide an up to date link, and explain its usage. And explain whether or not it is up to date. It will give different answers to Grimy's Perk Optimizer.
Perk Distribution
There are certain perks whose effects are compounding/exponential. In other words, getting one level of the perk will always give the same relative improvement, regardless of the current perk level. As such, the relative cost of these perks should remain the same. Since perk costs grow exponentially with the same base, the difference in level between these perks should also remain the same.
The compounding perks are carpentry, resilience, artisantry, and resourcefulness. Coordinated can almost be treated as a compounding perk, even though it is sesqui-exponential.
We take carpentry as our base line. The following is how much 1 level of perk should cost compared to 1 level of carpentry.
| Perk | Relative cost compared to carpentry | ||
|---|---|---|---|
| carpentry | 1 times the cost of carpentry (of course) | ||
| resilience | 1/3 times the cost of carpentry | ||
| artisantry | 1/12 times the cost of carpentry | ||
| resourcefulness | 1/12 times the cost of carpentry |
As for the other perks
| Perk | At perk level 0 | At perk level 20 | At perk level 40 |
|---|---|---|---|
| Power | 1/6 times cost of carpentry | 1/12 times cost of carpentry | 1/18 times cost of carpentry |
| Toughness | 1/6 times cost of carpentry | 1/12 times cost of carpentry | 1/18 times cost of carpentry |
| Motivation | 1/6 times cost of carpentry | 1/12 times cost of carpentry | 1/18 times cost of carpentry |
| Pheromones | 1/6 times cost of carpentry | 1/12 times cost of carpentry | 1/18 times cost of carpentry |
Finally, coordinated should cost 2-3x the cost of carp, depending on how many coordination you usually buy. As you get into 150+ coordinations, the cost of coordinated should increase relative to the cost of carp. 4-5x becomes the normal later.
As for the other perks, looting should be focused upon, and should definitely cost more than motivation/power/toughness. The perks that can be maxed should eventually be maxed.
Spire Perks
The incremental spire perks should cost a certain proportion of their corresponding normal perks. However, this proportion depends on both the normal perk level and the spire perk level. The ratio of the ideal spire perk cost to normal perk cost is given below. Note that this is not a ratio of the total cost, but the cost of the last level of both perks.
Toughness/Power/Motivation
In general, n/20 + 1/5
| Perk level 40 |
Perk Level 60 |
Perk Level 80 |
Perk Level 100 | Perk Level n | |
|---|---|---|---|---|---|
| Spire Perk Level 0 | 3/5 | 4/5 | 5/5 | 6/5 | n/20 + 1/5 |
| Spire Perk level 100 | 3/10 | 4/10 | 5/10 | 6/10 | n/20 + 1/10 |
| Spire Perk Level 200 | 3/15 | 4/15 | 5/15 | 6/15 | n/20 + 1/15 |
| Spire Perk Level 300 | 3/20 | 4/20 | 5/20 | 6/20 | n/20 + 1/20 |
| Spire Perk Level 400 | 3/25 | 4/25 | 5/25 | 6/25 | n/20 + 1/25 |
| Spire Perk level 500 | 3/30 | 4/30 | 5/30 | 6/30 | n/20 + 1/30 |
| ... | ... | ... | ... | ||
| Spire Perk 1000 | 3/55 | 4/55 | 5/55 | 6/55 | n/20 + 1/55 |
| Spire Perk level 1500 | 3/80 | 4/80 | 5/80 | 6/80 | n/20 + 1/80 |
| Spire Perk level 2000 | 3/105 | 4/105 | 5/105 | 6/105 | n/20 + 1/105 |
| Spire Perk level 2500 | 3/130 | 4/130 | 5/130 | 6/130 | n/20 + 1/130 |
| .... | |||||
| Spire Perk level 5000 | 3/255 | 4/255 | 5/255 | 6/255 | n/20 + 1/255 |
| Spire Perk level 7500 | 3/380 | 4/380 | 5/380 | 6/380 | n/20 + 1/380 |
| Spire Perk Level 10000 | 3/505 | 4/505 | 5/505 | 6/505 | n/20 + 1/505 |
| Spire Perk Level m | 3/m/20+5 |
4/m/20+5 |
5/m/20+5 |
6/m/20+5 |
n/20+1/m/20+5 |
Carpentry
The relative cost of Carpentry I and Carpentry II only depends on the level of Carpentry II.
| Carpentry II Level | Cost of Carpentry II Relative to Carpentry I | ||
|---|---|---|---|
| 0 | 1/40 | ||
| 100 | 1/50 | ||
| 200 | 1/60 | ||
| 300 | 1/70 | ||
| 400 | 1/80 | ||
| ... | ... | ||
| 800 | 1/120 | ||
| 1200 | 1/160 | ||
| m | 1/n/10+40 |
Looting
The following is a table of the ideal relative cost of Looting I vs Looting II.
| Looting Level 40 | Looting Level 60 | Looting Level 80 | Looting Level 100 | Looting Level n | |
|---|---|---|---|---|---|
| Looting II Level 0 | 3/20 | 4/20 | 5/20 | ||
| Looting II Level 100 | 3/25 | 4/25 | 5/25 | ||
| Looting II Level 200 | 3/30 | 4/30 | 5/30 | ||
| Looting II Level 300 | 3/35 | 4/35 | 5/35 | ||
| Looting II Level 400 | 3/40 | 4/40 | 5/40 | ||
| ... | |||||
| Looting II Level 800 | 3/60 | 4/60 | 5/60 | ||
| Looting II Level 1200 | 3/80 | 4/80 | 5/80 | ||
| Looting II Level 1600 | 3/100 | 4/100 | 5/100 | ||
| Looting II Level 2000 | 3/120 | 4/120 | 5/120 | ||
| ... | |||||
| Looting II Level 4000 | 3/220 | 4/220 | 5/220 | ||
| Looting II Level 6000 | 3/320 | 4/320 | 5/320 | ||
| Looting II Level 8000 | 3/420 | 4/420 | 5/420 | ||
| Looting II Level m | n/20+1/m/20+20 |
Garden Vs Mountain Maps
After the player has completed the Decay Challenge, Garden Maps may be strictly better than Mountain Maps, even if the player is only interested Metal. This only holds when income from chronoimp/jestimp vastly overwhelms income from normal loot. My calculation indicates this holds when chronoimp/jestimp makes up 70% of the loot, assuming all workers are mining metal. Another source, however, indicate that this is 80%. Too lazy to check math; maybe someone else can confirm one way or another?
Either way, assuming no Staff Heirlooms, this occurs roughly when the total motivation multiplier is roughly 400 to 600%. This would for example, correspond to combining a Motivation I level of 40 (3 times), and motivation 2 level of 100 (2 times). If one has a Staff Heirloom, one must multiply the motivation multiplier by Miner Efficiency multiplier, and divide by metal drop multiplier. It should be noted that a 120% metal efficiency represents a 2.2 multiplier.
Even if the player has a multiplier of less than 4, the player should still consider garden. After all, Garden gives both Food and Wood, and one or the other might also be useful.
Personal testing indicates that Garden is significantly better than Mountain for a player with Motivation 46 and motivation II 65. Note that this is not a necessary condition, merely a sufficient condition. Even though Jestimp are not calculated in the in game Metal per second display, Metal loot seems roughly the same or even higher for Garden maps compared to Mountain maps on the display. This is done with roughly equal miner efficiency (120%), and metal loot (144%) on the staff.
Simplifying Gameplay and Speedruns
On the map menu, instead of "repeating forever", set the repetition to "repeat to 10", and set the other option to "exit to world". This way, you will automatically run a map 10 times, then continue onto the world. You can do this once per zone whenever you are too far back on prestiges to progress in zones. You need to set the equipment looting section to "Equip First".
Dagger Climb
The Dagger Climb is a strategy for quickly getting to high zones. Change the equipment looting section to "Equip First" instead of Tier First. This will allow the player to get all the shields before getting daggers, and getting all the daggers before the boots. You can further select "repeat to 10" for a less micro intensive play style.
Getting only daggers, and possibly boots, will greatly speed up the early game. You get a new dagger/boot in every zone ending with 1 and 6. This is useful for speed runs before the player gets the Watch challenge, and for getting high Helium per hour.
Watch
The Watch challenge will give you all prestiges from maps up to zone 180. This means the player does not have to run very many maps until zone 180. This challenge is best method of getting speed run achievements until you have Blacksmithery and a high end zone. This challenge is also really good for getting into later zones for Magmites and Dark Essences. While you don't gain as much bonus Helium compared to a Corrupted run, you can get to the relevant zone much quicker and easier.
There is also a point after the player unlocked Magma where the player should use Watch to farm for Helium outside of Daily Challenges. The slight loss in Helium is acceptable for the much faster speed.
Nomenclature and Acronyms
| dimsum | Dimensional Generator | ||
| DE | Dark Essence | ||
| GS | GreenSatellite | ||
| HE, He | Helium | ||
| HZE | Highest Zone Ever | ||
| VM | Void Map | ||
Using Bone Portals
Bone portals effectiveness should be measured by the amount of time it would take to gain the amount of helium from the portal using other methods. For example, if a bone portal would give 1 million helium, and it takes 2 days of normally playing to gain 1 million helium, then the bone portal is quite effective. If a bone portal would give 10 million helium, but it only takes 2 hours to gain 10 million helium, then the bone portal is much less effective.
The player should consider using bone portals in a few situations. First of all, if a player has spare bones early on, using bone portals is usually a good idea. As a player portals more and more, each portal takes a shorter amount of time. Right after the first long push after breaking the planet, or after the first electric run, is also a good candidate. In general, after finishing a hard helium challenge for the first time is a good time to use a bone portal.
A special consideration should be given to Toxicity runs. The player should consider doing a full stack Toxicity run, just to build up the bone portal. In the late game, the first time the player does their void maps inside corruption, or the first time the player does their void maps inside magma, is a good time to use the bone portal.
Technical Issues
Ignore this section if you are not interested in technical issues.
Where can I find ...?
The Trimps game?
- https://www.kongregate.com/games/greensatellite/trimps
- http://trimps.github.io/indexKong.html
- https://trimps.github.io/
Trimpy Information?
- https://www.reddit.com/r/Trimps
- http://www.kongregate.com/forums/11405-trimps
- This wiki.
- Trimps chat rooms at Kongregate.com (requires login)
Calculators
- A list of calculators is on this page.
Saving and Exporting
The game is normally saved in your cookies. The game at Kongregate web site (1) and the github/Kong version(2) share the same save file. The other version on github (3) uses a different save file. The game autosaves every few minutes by default. You can turn off autosaving in the settings. If something happens to your cookies, your progress will be lost.
To protect your game progress: Backup! Export and save your progress in a file.
- Click the export button, copy the text (save string), paste it in a simple text file and save it somewhere safe.
The save string is a snapshot of your savefile of the moment you clicked 'Export'. You can import your save string back into the game, and continue from where you were when you exported your save string. To always have a recent backup of your latest progress, do it often.
If the player is logged into Kongregate, she can also save online with PlayFab. The player probably should still have a save file elsewhere.
You can also import your save string onto a different computer, to move your save file. If worst comes to worst, there are save file generator, which can be used to create a save file[16].
If necessary, ask the people in chatroom 1 on Kongregate. There are people who are willing to help.
Troubleshooting
My game won't run, or certain elements are missing!
- Have you tried turning it off and on again?
- Certain firewall, ad-blockers, and script-blockers can interfere with the game. Try disabling them. The game requires javascript.
- Try a different browser?
- Check if you can run other Kongregate games.
My game is laggy!
- Have you tried turning it off and on again?
- Refresh? Close your browser, make sure it is closed via task manager, and then reload.
- Do you have too many tabs open?
- Is firefox inspector open? Close it.
- Go to settings; turn off animation and progress bar.
- Try a different browser?
Portal is missing!
- You need to complete the Dimension of Anger (zone 20).
Help! something is wrong
In chatroom 1, there is a player named REDACTED. You can contact him by REDACTED REDACTED and also REDACTED.
Developer, Suggestions, Bug Reports
Who is the developer and how can I contact him?
- The developer is GreenSatellite. Every so often, he comes to room 1 of kongregate trimp chat room. He is also active on the kongregate forums, and on reddit, both of which are linked above.
How do I make suggestions?
- If you need to read a new player guide, why do you feel qualified to make suggestions?
- https://www.reddit.com/r/Trimps
- http://www.kongregate.com/forums/11405-trimps
Where can I report a bug?
---
Supporting The Developer
You can support the developer by buying bones with kreds on kongregate. 75% of the proceed goes to GreenSatellite. 25% of the proceed goes to making greedy people at GameStop fat.
I know of no way to support the developer financially otherwise. Peer pressure GreenSatellite into making a donate page.
High Scores
The high score of this game depends on the highest zone you've reached, and the highest cell you've reached in that game. The last two digits in High Score correspond to the number of cells you've completed in the highest zone you've been in. The other digits correspond to the highest zone you've been in.
ex. A High Score of 10233 means that a player has reached zone 102, and has completed 33 cells of that zone.
High Score? What High score?
- You have to be playing on Kongregate, with a Kongregate account.
My High Score is inaccurate!
- Kongregate High Score submission is notoriously bad.
Holy crap, someone has reached zone 700?
- Kongregate High Score is filled with hackers/cheaters.
Manifesto
This guide was originally written to stop the onslaught of questions akin to "What do gems do?". The goal of this guide essentially has not changed. It hopes to stop the cancerous growth of Help Vampires [1] .
I highly recommend a reading of that page. In short, a help vampire is a person who would ask others to solve their problem rather than googling a solution, or a person who asks an impossible question (what is the optimal way to play this game?) and expects step by step help.
These people create tiresome conversations that drives away the experts, and ultimately results in a community full of shallow discourses.
To combat this problem, I have created this guide, which I hope to be a all-inclusive library of knowledge. Essentially, I hope it will be something like the Trimp StackExchange: a library of knowledge that is not hidden, not behind a paywall, and not filled with useless discourses (except jokes).
You can help by doing the following:
- Reading the page on Help Vampires, and following its suggestions.
- Do not enable Help Vampires by answering their questions. Instead, link them to this page.
- Post questions that you frequently see in the comment section.
- Keep this guide up to date.
- Help link pages to this guide.
References
- ↑ 1.0 1.1 http://slash7.com/2006/12/22/vampires/
- ↑ http://tvtropes.org/pmwiki/pmwiki.php/Main/DeathOfTheAuthor
- ↑ https://en.wikipedia.org/wiki/No_Child_Left_Behind_Act
- ↑ http://kongregate.wikia.com/wiki/Chat_rooms
- ↑ http://www.whoishostingthis.com/blog/2013/12/06/internet-infographic/
- ↑ http://dictionary.reference.com/browse/guide
- ↑ http://dictionary.reference.com/browse/faq
- ↑ https://www.reddit.com/r/incremental_games/comments/3fy8ug/can_we_try_and_define_what_an_incremental_game_is/
- ↑ https://en.wikipedia.org/wiki/Ultimate_fate_of_the_universe
- ↑ https://www.reddit.com/r/Trimps/comments/43c3e9/infinite_helium_but_cant_get_past_z594/
- ↑ https://en.wikipedia.org/wiki/Laziness
- ↑ https://en.wikipedia.org/wiki/Visual_impairment
- ↑ Discussion with Tonton1964, Killer_of_cows ; and https://grabarz19.github.io/TrimpsVoidCalculator/
- ↑ http://www.worldometers.info/world-population/china-population/
- ↑ https://en.wikipedia.org/wiki/Generator_(mathematics)
- ↑ https://htmlpreview.github.io/?https://github.com/slothario/heliumadder/blob/master/index.html